
Today, we’re going to delve into how to apply the color knowledge we’ve acquired to effectively layer your colors. Our focus will primarily be on layering oil paint, as I am predominantly an oil painter. Understanding two key aspects of layering oil paints is crucial:
- Fat Over Lean
- The strategic placement of colors on top of each other to achieve the desired final effects in a painting.
- Positioning colors beside each other according to color interaction.
1. Fat Over Lean
The “fat over lean” principle refers to the technique where paint layers that are “leaner” or “thinner,” meaning they have less oil content, are applied first.
Subsequently, layers with more “oily” paint are added. This is crucial because oil paint undergoes slight expansion and contraction over time as it dries, and layers with different oil contents dry at varying rates, affecting the painting’s longevity and appearance.
Why is this important? Oil paints with higher oil content (fat) take longer to dry and are more flexible, while those with less oil (lean) dry faster and are less flexible. If a “fatter” layer is applied beneath a “leaner” one, the top layer may dry and harden before the bottom, leading to cracking or wrinkling as the layers age. This method helps to ensure the painting dries evenly and remains stable over time.

Materials like cadmium colors dry slower than earth tones like umbers due to their chemical composition.
Environmental factors, such as humidity and temperature, also play a role.
The higher the temperature, the faster the paint coating dries because its solvent(oil or water) evaporates faster.
Paint also dries slower if the humidity levels are high because the paint solvent evaporates at a lower rate if there’s more water vapor or moisture in the air.
Colors thinned with turpentine or mineral spirits dry faster, offering artists control over the drying process. Ignoring this rule can lead to uneven drying, cracking, or discoloration.
The oil painting process typically begins with thin washes to “map out” the composition, followed by the application of thicker paint directly from the tube or mixed with oily mediums like linseed oil.
2. Placement of Colors for Desired Effects
This concept encompasses both indirect oil painting techniques like glazing and scumbling, as well as the various techniques in direct painting (alla prima). We’ve discussed glazing and scumbling in detail previously, and you can find more information at the following links:
3. Color Interaction
This method involves placing colors beside each other to enhance or mute their visual impact through interaction.
A prime example is Henri Matisse,( https://www.britannica.com/biography/Henri-Matisse) who masterfully used primary and secondary colors, as well as complementary colors, to create vibrant and dynamic compositions. Each brushstroke in Matisse’s paintings was deliberately placed to interact with surrounding colors, creating a bold and rich appearance. Adhering to the “fat over lean” rule, his works have maintained their integrity over time.
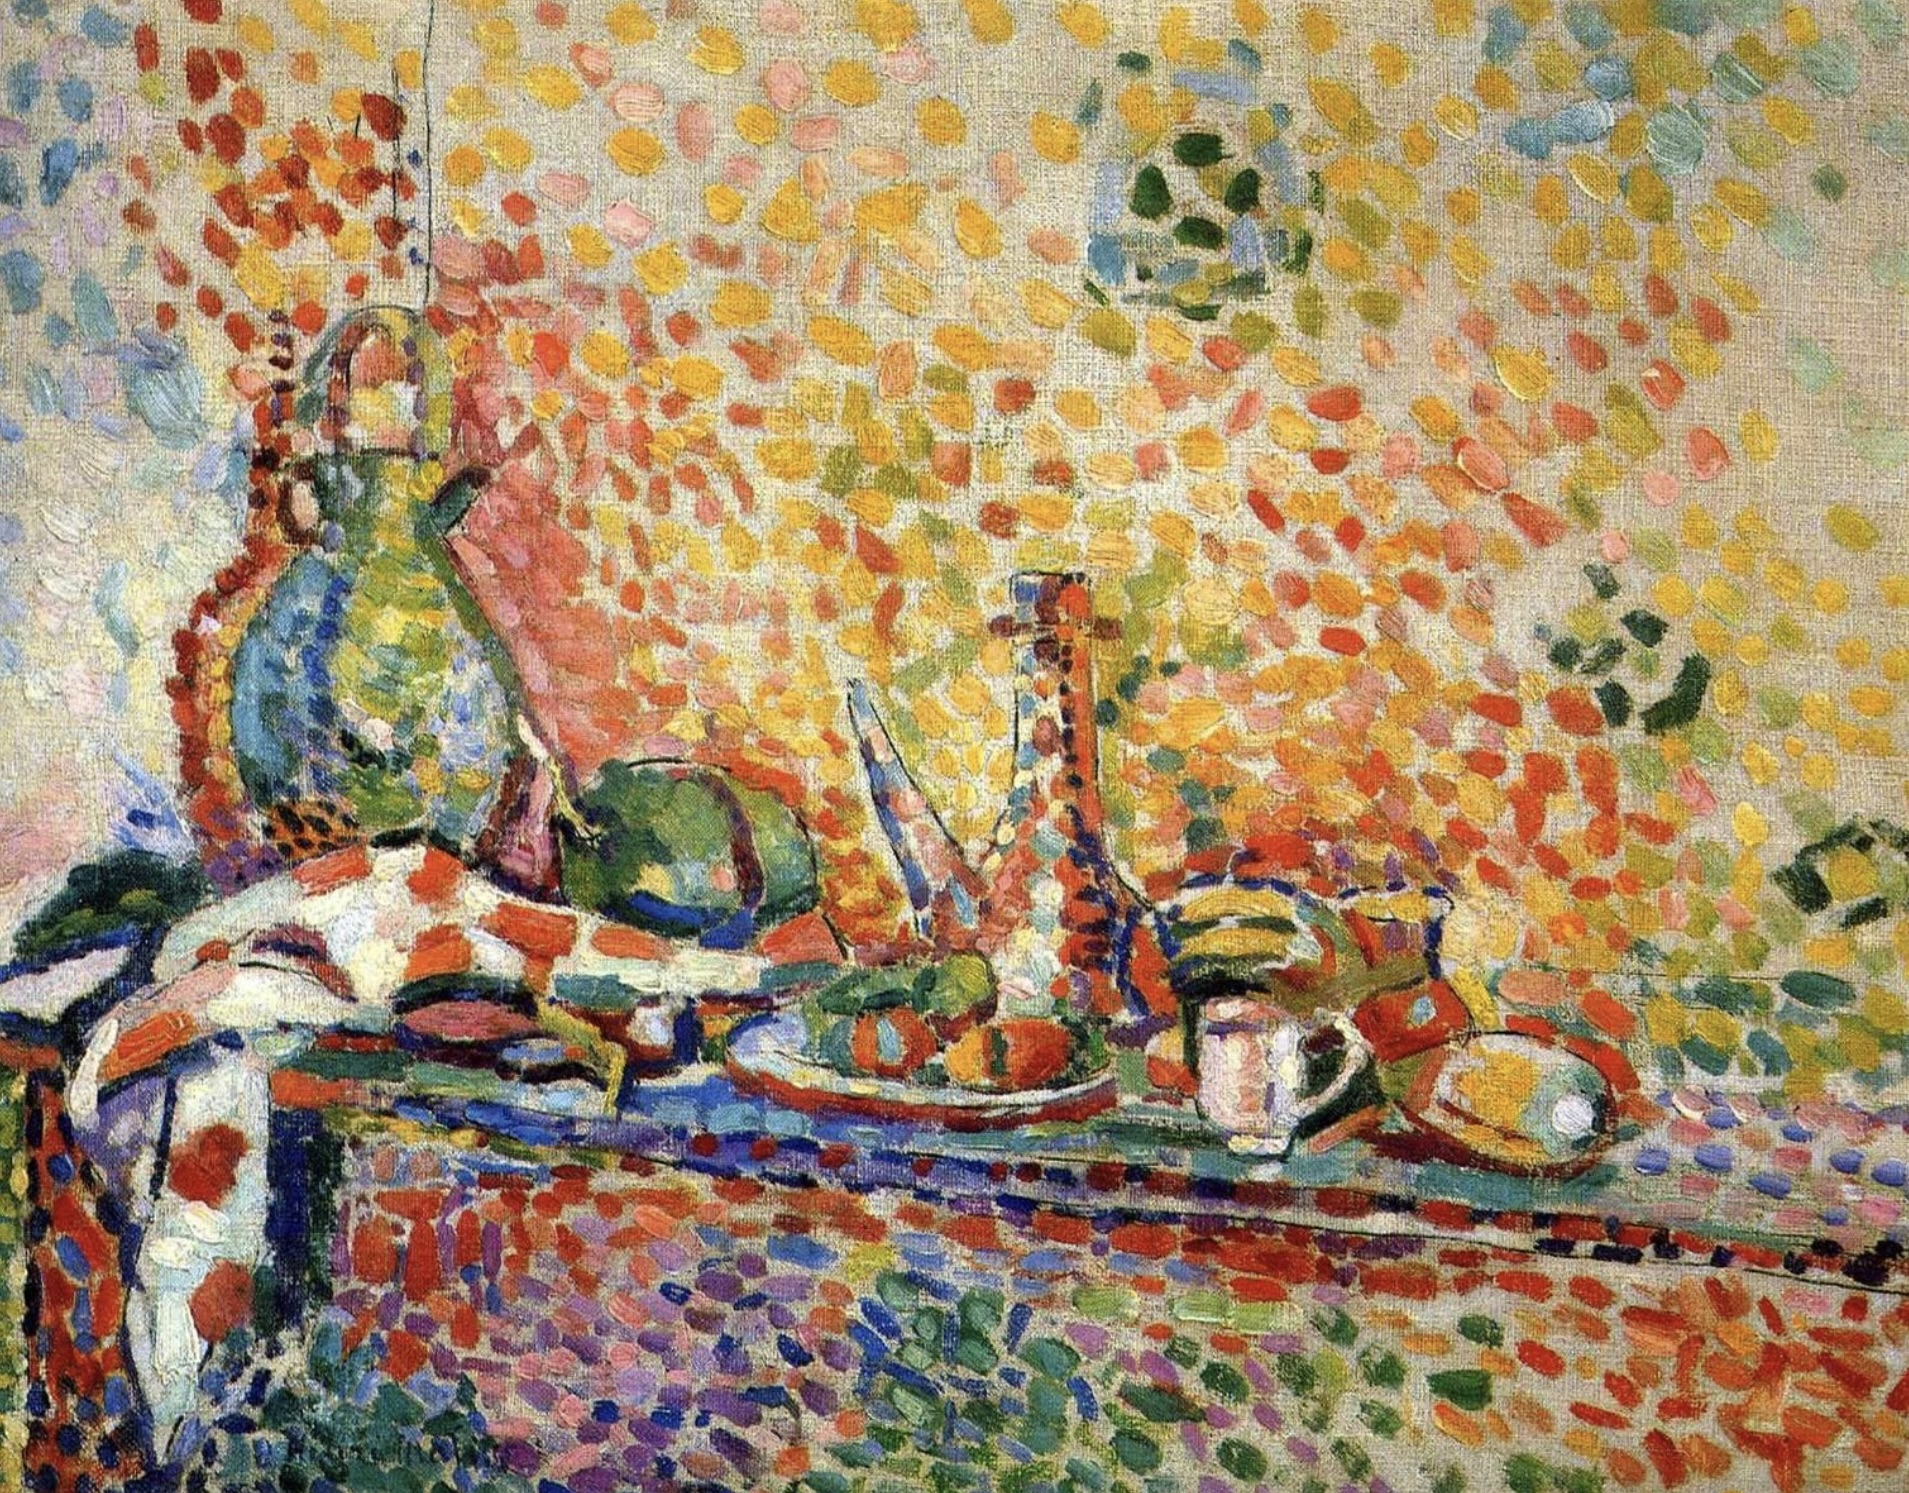
Understanding color interaction is not just about theory but also about practice. Try experimenting with different color placements in your own work. Notice how colors change based on their neighbors. For instance, a blue might appear more vibrant next to an orange, its complementary color, than it does next to a green.

I encourage you to share your experiments and discoveries with color interaction on social media or within our community.
It’s fascinating to see how each artist interprets and applies these principles differently, leading to a rich tapestry of styles and techniques.
In essence, mastering these methods is all about meticulously planning your colors and paints to create outstanding paintings. Each technique and aesthetic choice contributes to achieving a unique harmony and depth in your artwork.
I hope you find these insights and suggestions helpful. Dive into your next painting project with these techniques in mind, and don’t hesitate to share your progress and experiences.
Let’s continue to learn and grow together in our artistic journey. Share this post with a friend who might find it helpful, and let’s spread the joy and knowledge of painting!
I have been surfing online more than 3 hours today, yet I never found
any interesting article like yours. It is pretty worth enough for
me. Personally, if all site owners and bloggers made good content as you
did, the net will be a lot more useful than ever before.
Thank you so much for your kind comments! Ying